US$8.69
Opiniões dos clientes
- Todos Comentários (364)
- Imagem (41)
- Vídeo (1)
Ordenar por:
Comentários apenas do seu país (Brazil)
|
Mostrar original
Uma parte da revisão foi traduzida automaticamente.
-
03/04/2014
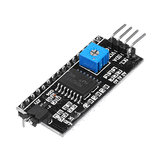
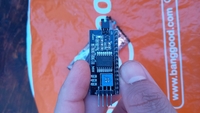
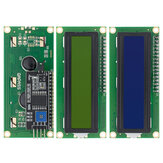
I used this with a Microchip PIC development board to interface to a 20x4 LCD display. With only 4 wires (including 2 for power) it's simple to set up and uses far fewer ports than the standard LCD parallel interface. As delivered the address pads A0 A1 and A2 are open but pulled high - so the I2C address is 0x4E. Ports P7,P6,P5,P4 of the PCF8574 interface to DB7,DB6,DB5,DB4 of the LCD Display. Port P3 is hard-wired to the backlight via a transistor: 1 = on / 0 = off. It's great that the backlight can be switched on and off via software with no additional hardware required. Port P2 is the display bit clock : E = 1 -> E = 0 active. Port P1 is R/W hardware Read/Write bit hardware : Read = 1 / Write = 0, so reading from the LCD display is possible, if required. Port P0 is RS Register Select : CmdReg = 0 / DataReg = 1. Display driver is HD44780 compliant. A great buy! I won't be interfacing to an LCD in future without it.
ComentáriosMostrar original -
16/05/2015
I bought some of these and found out that there are different models which need different pin configurations. Here is a beginners guide for the ones from Bangood: http://safe-power.appspot.com/i2c-en.html You need to download one library, and you are ready to enjoy LCDs on your arduino with only 2 Arduino pins occupied (plus GND and VCC). This little board saves you time and pins :-)
ComentáriosMostrar original -
 FabianVIP1CL18/01/2019
Good quality.
ComentáriosMostrar original -
14/02/2021
Marrocos atingiu com sucesso e com boa qualidade de embalagem
ComentáriosMostrar original -
09/04/2021
nice product. its really helpful to reduce the pins needed on a lcd. cool to see that there is a jumper include to enable or disable the onboard led. can be helpful in low power situations. the product was not damaged in shipping and the quality looks great!
ComentáriosMostrar original -
11/09/2020
recebido em bom estado e bem embalado. Ainda é necessário testá-los
ComentáriosMostrar original -
kabenerVIP3NL27/02/2017
The I2C interface module works fine on my blue 1602 LCD module. The I2C address is 0x27 out of the box so remember to modify your code accordingly. There is a very clear description that can be found here: http://arduino-info.wikispaces.com/LCD-Blue-I2C. It clearly describes the different available versions of the I2C interface. The one I received was version 3. When I first connected it and run the sample code I adjusted for the 16x2 display it did not seem to show any information on the display. The root cause was the potentiometer on the I2C interface not to be setup correctly out of the box. I needed to adjust it to change the contrast and show the characters on the screen. So I am happy with this interface as it reduces the connection to only 4 wires (2 for the power supply and 2 for the communication).
ComentáriosMostrar original -
20/08/2013
After receiving item, I test it with good results. Runs fine.
ComentáriosMostrar original -
08/07/2020
Fim do trabalho na primeira tentativa. Atenção para definir adequadamente o contraste no aparador: as gravações no display podem parecer tão esmaecidas para fazer você pensar que não funciona. Procurei o endereço com um scanner I2C (código facilmente encontrado no site Arduino) e resultou no meu item 0x27. Para alterar o endereço, você precisa soldar jumpers nos pontos A0-A1-A2 próximos ao aparador. Funcionou no primeiro tiro. Tenha cuidado ao ajustar o contraste com o aparador, pois a letra no display pode ser tão escamosa que parece não funcionar. Detectado o endereço com um scanner I2C (pode ser encontrado facilmente no site da Arduino) na minha amostra era 0x27. Para alterar o endereço, você precisa soldar jumpers nos ângulos A0-A1-A2 próximos ao aparador.
ComentáriosMostrar original -
19/10/2018
nice package
ComentáriosMostrar original


Show:
Você pode estar interessado em
-
 US$8.79
 -
US$12.82
-
US$5.59
-
US$11.99
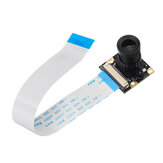
Módulo de câmera para Raspberry Pi 4 Model B / 3 Model B / 2B / B+ / A+
-
US$11.53
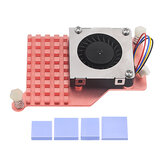
Radiador de cobre puro com ventilador de refrigeração para Raspberry Pi
-
US$119.99
-
US$39.55
-
US$12.00
-
US$67.99
-
US$47.99
-
US$27.99
Placa de expansão Raspberry Pi CM4 com interfaces HDMI/USB/CSI/M.2 SSD incorporadas
-
US$17.99
-
US$12.99
-
US$151.79
-
US$30.35
-
US$7.19
-
US$34.99
-
US$25.99
-
US$48.59
-
US$16.99
-
US$35.99
-
US$18.99
-
US$69.99
Módulo de câmera Framboesa Pi Optical Image Stabilization OV5647 Lends de 5MP Adequado para robôs
-
US$15.28
-
US$19.99
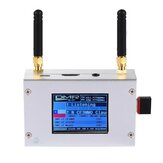
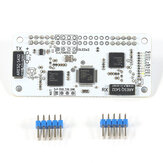
Suporte MMDVM Hotspot Pi-Star para módulo P25 DMR YSF + Antena para Raspberry Pi
-
US$13.99
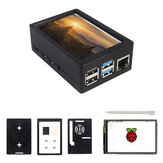
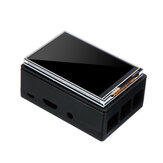
Kit de tela de toque TFT de 3.5 polegadas 480*320 50FPS com estojo de ABS para Raspberry Pi 4B
-
US$29.99
-
US$35.99
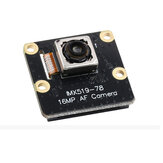
Câmera Raspberry Pi 16MP IMX519 HD Módulo de foco automático Compatível com 4B/Zero 2W
-
US$123.60
-
US$16.99
Monitor LCD TFT sensível ao toque de 3,5 polegadas 320x480 + caixa para Framboesa Pi
-
US$25.37
-
US$12.99
-
US$11.59
-
US$7.99
-
US$8.99
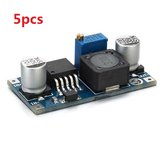
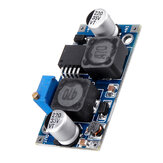
Módulo de Fonte de Alimentação Ajustável DC-DC LM2596 de 5 Peças
-
US$9.57
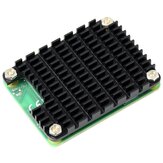
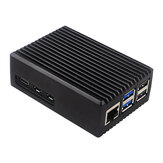
Caixa de dissipação de liga de alumínio Raspberry Pi 5 com resfriamento passivo e casca listrada
-
US$10.99
Módulo de conversor ajustável DC-DC Boost Buck Step Up Step Down XL6009 adequado para painel solar
-
US$9.99
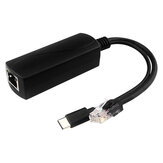
Divisor POE Ativo Power Over Ethernet de 100Mbps/1000Mbps 5V 3A Tipo-C para Raspberry Pi 4B
-
US$13.99
-
US$10.99
-
US$22.55
-
US$31.67
-
US$25.99
-
US$6.99
-
US$9.99
Módulo de sensor de pressão atmosférica de alta precisão GY-BMP280-3.3 - 3 peças
-
US$9.99
Módulo de display LCD Geekcreit® 5V 2004 20X4 204 2004A tela azul
-
US$15.99
Módulo sem fio NRF24L01+PA+LNA de longa distância de 1100 metros com antena, 3 peças
-
US$25.99
Tela de toque USB de 3.5 polegadas MPI3508 Real HD 1920x1080 para Raspberry Pi 3/2/B+/B/A+
-
US$7.87
Placa de expansão compatível com HDMI para Raspberry Pi Pico


recommendation for you
-
US$4.79
-
US$5.99
-
US$4.99
-
US$6.99
-
US$6.99
-
US$14.99
-
US$9.99
-
US$11.99
-
US$6.99
-
US$22.99
-
US$3.99
-
US$12.99
-
US$17.99
-
US$6.99
-
US$6.99
-
US$12.59
-
US$5.99
-
US$7.87